Saturday, 1 April 2017

Oracle APEX 5 - Report template tip

APEX 5 and custom report templates

APEX Reports on a next level

Fiddly default setting - "Sortable"


Small things make life happy! but sometimes it can take 4 eyes looking for obvious and cost you hours of your time before you found a solution. Does it sound familiar?

First thing that comes to my mind when someone mentions Custom report templates in Oracle APEX is the name of fellow APEXer - Jorge Rimblas. Why?

So many times Jorge showcased how great your reports can be if you put minimal efforts into them. Staring from very simple examples then spicing it up and bringing it to whole new level of presentation and yet still keeping it simple which is the most important thing.

This blog is not about how to create a custom report template but to showcase one small settings that you need to be aware of to save yourself some time.

Please by all means I highly recommend reading through and checking Jorge's blog for any further tips how to create your first report templates.

Situation: we created a template looking like this that is now able to run from a query.
Excellent work give your self a pat! :D

Next step is you try to add another field to the report and then things go bad. What I mean by it?

Check out this example:

I have a report with set of nicely looking blocks that contain some formatted text. All beautified and made fancy by CSS.

Idea is to present them in order 1 to n.

What happened as soon as I would add new column to my SQL query - my report elements would be sorted by something other than what I planned for.
OK it was clear as a day that it was an issue with 'sort by' but what I could not pick up is why it was showing up when I am simply defining a new column.

Then thanks to the help of second pair of eyes and valuable APEX experience of Skillbuilders (thanks Tyson) I was pointed to report column property setting called
Of course as soon is was set to No things were back to normal. This thing is now clear as day but at that moment information simply was not getting to my brain.

That is why I decided to log it here so that next time I know what to look for.

 
Thanks,
SLino

Wednesday, 29 March 2017

How to preview your local image in HTML?

Web design tip

Preview an image from your PC live in your app

Nifty way to hack this problem - non APEX related


It is totally APEX unrelated but still can be used by developers regardless of technology.

Ever wanted to preview how your newly designed image will look like once you upload it to an app. I know what you will say why would I even want/need to do this now when we have apex-frontend-boost or by doing it directly in your app.

What if you do not have access to DEV/PROD environment or application server and need to deliver newly designed image for your client application? Or maybe you do not want to bother setting these up. Or just wanna do one-off thing.

If you google this more than once probably means you need to write it down, doesn't it. So doing the same for my future reference.


Situation: Create a logo for client Facebook account. You spent time to design a new logo and now it is time to try it before it gets deployed by your client.

How do we go about to test this?

Again google is your friend, I found this solution there too and I am sure all of them work in a similar way.

If you inspect your FB page you are looking for section containing "_qa1" class this is where normally FB logo sits:
<div class="_qa1"><a aria-label="Profile picture" class="_2dgj" href="....." rel="theater"><img class="_4jhq img" src="..." alt="" width="170" height="170"></a><!-- react-empty: 8 --></div>
  1. Open browser inspector tool. Please remember not to refresh the page at any point as changes will be lost.
  2. Find an image you want to temporary replace. Check if it has ID assigned if not assign one to it by changing its DOM HTML with ID = "your_ID".
  3. After the image add this code into your HTML:
    <input onchange="document.getElementById('your_ID').src = window.URL.createObjectURL(this.files[0])" type="file" >

What this will do is let you upload the file from your local PC. Simple. 

Once you show it to your client and you all are happy, it is deployment time.

Thanks,
SLino

Tuesday, 28 March 2017

APEX 5.1.1 patch release

APEX 5.1.1 patch released

Available on OTN for download

Time to upgrade again


New APEX patch 5.1.1 is available from OTN - download

List of patch set notes can be found here -> 5.1.1 Patch notes.

As you can see list is a really long one so we better start upgrading our 5.1 instances.
 
Cheers,
SLino

Wednesday, 8 March 2017

APEX 5.1 Interactive grid - Making columns readonly

APEX 5.1 Interactive grid

Making columns readonly

My second APEX 5.1 post


This is just a simple post on how to make some of the columns read only.

If you want to know in details how IG is structured and all those nice hidden little features please visit John Snyder blog

Again John did amazing job giving us tips from behind the scene even before APEX 5.1 was publicly available. Thanks John.

Situation: we created Interactive Grid for users to view/edit some table data. Now we realized some columns (other than primary key column) content is better not to be updated by end user. Further we want to allow them to enter new rows but disable them from updating the existing ones. How do we do this?

Check out this example:
We have a standard looking IG in editable mode. There are multiple ways how we can sort this one out.

Notice how rows except the first one are highlighted in gray. Showing it as "read only" and not accessible by end users.

First we can use Allowed Row Operations Column setting in Attributes section of your report where we define a column in our query that will dictate which rows can be updated or deleted.

But again this is now row based control.

What if we only want a particular column to be controlled? Then there is setting siting under your column properties Query Only that can preserve the value and make it inaccessible for Insert or Update operation.

Using this setting you can make it read only but trouble is then it is read only in all modes. Even when users try to enter a new row which is not what we want.
To achieve read only per column needed I used these steps. Assign an class "is-readonly" to your desired column in my example this is Department name.


Then add Dynamic Action Event: Mouse enter with td.is-readonly as selector.
Executing Javascript code:
$( "td.is-readonly:empty" ).removeClass( 'is-readonly' );

Live demo. 


18/04/2017 Update 
Easiest  how to do this is by setting Column Properties as 


Thanks,
SLino

Thursday, 2 March 2017

APEX 5.1 - Interactive grid limitation

APEX 5.1 IG limitation

Deleting long text columns producing an error

Error: Request Entity Too Large


This is a quick post on thing I noticed on APEX 5.1 IG last night that I wanted to share.

It is highly recommended to have a user friendly error message handler on your application so that users do not get a nasty ORA messages but also importantly that malicious code does not expose any details it does not need to see.

On top of this a good practice is to keep track of all error messages that arise in your app which I have done using submit_feedback procedure.


This is exactly where my problem showed up.

I detected an error on a page so I went in to see my feedback records using internal APEX feedback UI -> Team development -> Feedback link.

All feedback were listed here as expected. I immediately notices how interface for this site has changed comparing to 5.0 as this used to be interactive report. I said great perfect example where to use IG. After a while I got more and more records in and after all issues were cleanup I decided why don't I delete some rows from my feedback list.

This is where this error showed up:

To expose all components of my error handling function that was posting feedback, all I was using was a proven method of:

apex_util.submit_feedback (
p_comment => '[message]= ' || l_reference_id|| ' - ' || p_error.message||chr(10)||'[additional_info]=' || p_error.additional_info||chr(10)||'[display_location]=' || p_error.display_location||chr(10)||'[association_type]=' || p_error.association_type||chr(10)||'[page_item_name]=' || p_error.page_item_name||chr(10)|| '[region_id]=' || p_error.region_id||chr(10)||'[column_alias]=' || p_error.column_alias||chr(10)||'[row_num]=' || p_error.row_num||chr(10)||'[error_backtrace]=' || p_error.error_backtrace||chr(10)||'[component_type]=' || p_error.component.type||chr(10)||'[component_id]=' || p_error.component.id||chr(10)||'[component_name]=' || p_error.component.name, p_type => 3, p_application_id => v('APP_ID'), p_page_id => v('APP_PAGE_ID'), p_email => null);
Seems like APEX is comfortable with saving this value but when it comes to deleting IG is hitting some sort of character limitation.

Please let me know if this sounds like something you encountered before. If really there is a limit in the buffer somewhere what does it mean and where does that sit currently. Last thing we want is for users to pick on this once application goes live, right?

I know there is a million other ways how I can store error log and review it. Simply I used this method before and it always worked so wanted to share my thoughts. I still find IG to be one of the best features of APEX 5.1.

Appreciate your feedback on this. Also to note that I am perfectly fine deleting 1 or 5 rows but all(19) seems to hit the limit.

 
Thanks,
SLino

Wednesday, 15 February 2017

Oracle APEX and DocuSign part 3

APEXOfficePrint and DocuSign part 3

Sign your AOP documents

Oracle APEX and DocuSign


Introductory two posts can be found here: part 1 and part 2.


Today's post is the final in a series. So far we have signed up with DocuSign, configured it, learned about APIs available, webhooks and run the basic example which triggered a document sent to our inbox. 

The end goal of today is to store a sign document in a DB table.

Again I will assume that AOP document is already generated and stored in DB table. 

We completed part 2 with a real case demo showing the whole process, now let's see all of the components.  

Key thing what we will be using here is a webhook - it can be manual or can be pre-configured by DocuSign engine. 

Step 1. Create an envelope -> send it to an email address but including a webhook this time:
 --SEND DOCUMENT USING WEBHOOK
DECLARE
 ..
 webhook_url varchar2(100) := 'http://your_apex_webservice/app/docusign/';
 ..
begin
    ...
    event_notification := '{"url": "' || webhook_url || '",
        "loggingEnabled": "true",
        "requireAcknowledgment": "true",
        "useSoapInterface": "false",
        "includeCertificateWithSoap": "false",
        "signMessageWithX509Cert": "false",
        "includeDocuments": "true",
        "includeEnvelopeVoidReason": "true",
        "includeTimeZone": "true",
        "includeSenderAccountAsCustomField": "true",
        "includeDocumentFields": "true",
        "includeCertificateOfCompletion": "true",
        "envelopeEvents": [ {"envelopeEventStatusCode": "completed"}],
        "recipientEvents": [ {"recipientEventStatusCode": "Completed"}]
    }';

    l_CLOB := apex_web_service.blob2clobbase64(l_BLOB);
    l_body := '{
                "status": "sent",
                "emailSubject": "Request a signature via email example",
                "documents": [{
                    "documentId": "2",
                    "name": "contract.pdf",
                    "documentBase64": "';

    l_body := l_body || l_CLOB;
    l_body := replace(l_body, chr(13) || chr(10), null);
    l_body := l_body || '"
                        }],
                        "recipients": {
                            "signers": [{
                                "name": "your name",
                                "email": "your email address",
                                "recipientId": "1",
                                "tabs": {
                                    "signHereTabs": [{
                                        "xPosition": "25",
                                        "yPosition": "50",
                                        "documentId": "2",
                                        "pageNumber": "1"
                                    }]
                                }
                            }]
                        } ,
                        "eventNotification": ' || event_notification || ',
                        "status": "sent"
                    }';
apex_web_service.g_request_headers(1).name := 'Content-Type';
apex_web_service.g_request_headers(1).value := 'application/json';
apex_web_service.g_request_headers(2).name := 'X-DocuSign-Authentication';
apex_web_service.g_request_headers(2).value := 

     '{  "Username":"your docusign username",
         "Password":"your pwd",
         "IntegratorKey":"your integKey" }';
 
l_result := apex_web_service.make_rest_request(

p_url=>'https://demo.docusign.net/restapi//v2/accounts/your_account_ID/envelopes/',
   p_http_method   => 'POST',
   p_body          => l_body);
 
dbms_output.put_line('l_result =' || substr(l_result,1,500) );
END;
Notice parts highlighted in yellow. These are differences from basic example we did in part2 post. Basically what is happening as part of envelope we are adding additional properties to declare new webhook to be used.  

If you decide to go with automatic, pretty much it comes to the same thing as example above except you have to configure your Connect entity to point to your APEX web service for all required events. Plus there is no need for webhook_url variable.

Step 2. Create APEX RESTful service as


as code for POST method use something similar to:
..
begin
   --GET XML returned by webhook
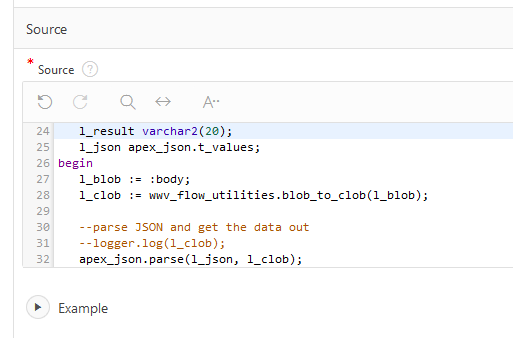
    l_clob :=  wwv_flow_utilities.blob_to_clob(:body);
 
   --GET ENVELOPE ID FROM XML RETURNED
  l_envelope_id := substr(l_clob, instr(l_clob, '<EnvelopeID>')+12,  ((instr(l_clob, '</EnvelopeID>')) - (instr(l_clob, '<EnvelopeID>')+12)) );
 
   --GET what documents are in envelope
    apex_web_service.g_request_headers(1).name := 'Content-Type';
    apex_web_service.g_request_headers(1).value := 'application/json';
    apex_web_service.g_request_headers(2).name := 'X-DocuSign-Authentication';
   apex_web_service.g_request_headers(2).value := '{  

        "Username":"your username",
        "Password":"your password",
        "IntegratorKey":"your integKey" }';
    l_result := apex_web_service.make_rest_request(
 p_url=>'https://demo.docusign.net/restapi//v2/accounts/your_account_ID/envelopes/'||l_envelope_id||'/documents',
        p_http_method   => 'GET');
 
    -- Display the whole SOAP document returned.
    --dbms_output.put_line('l_result =' || substr(l_result,1,500) );
    --parse result to get DOCUMENT_ID
    apex_json.parse(l_json, l_result);
 l_document_id:=apex_json.get_varchar2(p_path => 'envelopeDocuments[1].documentId', p_values => l_json);
    --dbms_output.put_line('l_result =' || l_document_id ); 
   --/*
   --GET DOCUMENT USING ENVELOPE ID AND DOCUMENT ID
   l_result_b := apex_web_service.make_rest_request_b(
 p_url=>'https://demo.docusign.net/restapi/v2/accounts/your_account_ID/envelopes/'||l_envelope_id ||'/documents/'|| l_document_id ||'?show_changes=false',
   p_http_method   => 'GET');
 
    --SAVE INTO TABLE
    insert into dummy (b, id) values (l_result_b, 1);  
   --logger.log('This is working test');
   htp.p(200);
Exception

    ..
end;
Big note: as part of DocuSign AOI envelope documentation it is mentioned that webhook should return a full document as a part of XML tag <PDFBytes> but I never got this working. 

Better said all XML documents tags returned were incomplete. I raised it on DocuSign forums but no answers till this day. Not sure though why. 
That is why in example above we are using a work around. Get the envelope ID from a webhook, for that envelope call a special API to get all documents contained in an envelope then get the content of particular document. 
Really there is not much to it than that. Of course you would not use this as your production code and you could rewrite some parts of it but basic idea is there. 
Things to be are aware of: 
  • please make sure you are using a correct URL to your APEX webservice.
  • envelope can include more than one document so you would have to loop through JSON returned before getting individual contents
  • workflow scenario can be much more complex including several signatures etc....

This simple demo it in action:here. 

Hope this will explain few questions you might have.


Thanks,
SLino


Thursday, 9 February 2017

Oracle APEX and Stripe

Oracle APEX and Stripe

Powerful payment gateway in your APEX applications

Full cycle integration


To kick off this post I will reference a cool intro blog series of fellow APEX-er Trent. In my opinion he did a good job giving you a good ground where to start. Thanks Trent!

Before you read the rest of my post these are "nice to read". Of course you can go directly to Stripe.com and check out their checkout examples. This is great add-on to help you understand how checkout form works in APEX.


Why?
Let's start with explaining how we decided to use Stripe. Before you jump into implementation of payment systems you probably had the same doubts.

Do you let your DB run the show or you let external system to does it all for you? Meaning do you go and implement your own system and only call external to do most basic tasks like charge customers while your DB takes care of whole business life-cycle.

There is lots to think about and there is no right or wrong answer here. What ever works for you better is the way to go.

From our perspective we wanted to let all of this being taken care of by external party like Stripe so we do not have to worry about when customers need to get charged, when they subscription expires, cancellations, dummy credit cards and above all we did not want to store customer info like credit cards at our end.

This is why Stripe was an obvious choice. It is really nicely documented, with heaps of examples. It is easy to integrate with your website plus it has all its API exposed that can be easily called from your APEX apps. What more can you ask for.

Note here that I am sure this all is possible with other gateway payment tools like PayPal too, my goal was to give some guidelines for people who decided to go with Stripe. I am not their ambassador or anything like that just have had a chance to work with it and hence the post.

Things to know?
After you went through Trent's basic examples and are able now to set up and run first transactions with Stripe from APEX. This is where we are picking up and continuing building on few more things you might need along the way.

To summarize Stripe in short, once you register and have an account you can log into admin console to configure your payment system. By all means this could probably be the only thing you need as Stripe gives you all you need to run your billings/payments from here manually. But is this what you want? :)


As you can see some of basic entities of this gateway are Customers, Plans, Subscriptions etc..... all of this is available to you through APIs. You can create, update and delete as you please.

In our projects we used two type of plan renewals. Customers can subscribe for monthly payments and annual ones. Another nice feature of Stripe we used, as we did not want to worry about who needs to be charged and when. All of this is done by Stripe.

All we have to do now is start using them.

How?
In example below and also in Trent's blog you see how APEX REST service calls can be used to make basic transactions this is nothing new.
To make calls to an API using apex_web_service package:
...
l_return := apex_web_service.make_rest_request(
p_url => 'https://api.stripe.com/v1/customers/' || l_stripe_customer_id,
p_http_method => 'DELETE',
p_username => l_username,
p_wallet_path => 'your_wallet_path',
p_wallet_pwd => 'wallet_pwd' );
apex_json.parse(l_json, l_return);
...

These are few of REST APIs we used.

https://api.stripe.com/v1/customers -> POST 
https://api.stripe.com/v1/customers/l_stripe_customer_id -> DELETE 
https://api.stripe.com/v1/charges -> POST 
https://api.stripe.com/v1/subscriptions -> GET 
https://api.stripe.com/v1/customers/l_stripe_customer_id/subscriptions/l_stripe_subscription_id -> POST 
https://api.stripe.com/v1/subscriptions/l_stripe_subscription_id -> DELETE 

To find out more about all parameters and what they do please check the API documentation. It is all in there.

Now that we are familiar with all of these it is time to hook it back to your database.

Webhook?

Looking it from above, fine we have a website and a system that can perform transactions but how does your DB know that these transaction are actually happening within your third party software? This is the key component of your payment system.

This is where webhooks come into play. Webhook is a mechanism that enables two systems to notify one another when certain events happen. Event is a driver of a webhook and usually it happens over web service calls between two parties.

Excellent, theory is done. How does that look in practice.
To create a webhook in Stripe go under your Account Settings and notice a Webhooks tab.


Here you can create your LIVE and TEST webhooks by simply entering an URL of your APEX RESTful service. For example:

http://www.myserver.com/ords/my_stripe_webhook/ 
Important thing to note is that you can select exact events that will be triggering messages back to your APEX system.


Once you set this up all you have to do now is consume this in APEX by creating a REST method.

Another great thing is that Stripe APIs use JSON as file format so parsing the REST responses becomes nothing more than json.parse for us. You will see more in a second.

To know whether or not things have happened there is an Events & Webhook log functionality where you can monitor and see all things triggered in Stripe.

How do you consume Stripe webhook?
Log into APEX then create a RESTful service with POST method.


If all is alright you should be able now to consume your Stripe webhooks and update your DB tables as needed.

Summary
This should give you some great ideas what is possible and how you can achieve it using Stripe.

All I can add is I absolutely had no problems working with it and learning how things work was really easy which is another important factor in your decision.


Thanks,
SLino

p.s. an example of Stripe REST APIs
/******************************/ 
function create_stripe_customer(p_token_id in varchar2, p_email in varchar2) return varchar2
as

  l_code        aop_plan.code%type;
  l_return      clob;   
  l_json        apex_json.t_values;
  l_email       aop_user.email%type;
  l_stripe_customer_id   aop_user.stripe_customer_id%type;
  l_stripe_plan_id       aop_plan.stripe_plan_id%type;
  l_stripe_subscription_id  varchar2(500);
  l_user_id     aop_user.id%type;  
  l_step        number := 0;

begin
      apex_web_service.g_request_headers(apex_web_service.g_request_headers.count + 1).name := 'Content-Type';
      apex_web_service.g_request_headers(apex_web_service.g_request_headers.count ).value := 'application/x-www-form-urlencoded'; 
     
     l_step := 1;    
     -- create customer
     l_return := apex_web_service.make_rest_request(
                    p_url         => 'https://api.stripe.com/v1/customers',
                    p_http_method => 'POST',
                    p_username    => l_username,                
                    p_wallet_path => p_wallet_path,
                    p_wallet_pwd  => p_wallet_password,
                    p_parm_name   => apex_util.string_to_table('email:source'),
                    p_parm_value  => apex_util.string_to_table(p_email||':'||p_token_id)
                  );
     -- returns customer details with stripe id       
     logger.log(l_return); 
     apex_json.parse(l_json, l_return);
         
     --check for errors
     if apex_json.get_members(p_path => '.', p_values => l_json)(1) = 'error'
       then
         logger.log('Step ' || l_step || '. Error processing new customer: ' || l_email || '. Reason: ' || apex_json.get_varchar2(p_path => 'error.message', p_values => l_json));
   --raise_application_error(-20001, 'Error processing new customer (stripe).'); 
       return 'ERROR';    
     else 
         --update AOP user table with new customer token
         l_stripe_customer_id := apex_json.get_varchar2(p_path => 'id', p_values => l_json);
         --logger.log(l_stripe_customer_id);  
         return l_stripe_customer_id;                     
     end if;         
     
 exception when others then return 'ERROR';

end create_stripe_customer;    


Example 2. Charging a credit card
/*******************************/
function charge_creditcard (p_amount in NUMBER, p_currency in varchar2,    p_stripe_customer_id in varchar2,
p_description in varchar2, p_wallet_path in varchar2, p_wallet_password in varchar2)
return varchar2
as

l_stripe_resp CLOB;
l_status      varchar2(100) := 'Fail';
l_json        apex_json.t_values;

begin
l_stripe_resp := apex_web_service.make_rest_request(
                p_url         => 'https://api.stripe.com/v1/charges',
                p_http_method => 'POST',
                p_username    => l_username,
                p_wallet_path => p_wallet_path,
                p_wallet_pwd  => p_wallet_password,
  p_parm_name   => apex_util.string_to_table( 'amount:currency:customer:description' ),
                p_parm_value  => apex_util.string_to_table(p_amount || ':' || p_currency || ':' || p_stripe_customer_id || ':' || p_description )
              );
       --logger.log(l_return);      
      apex_json.parse(l_json, l_stripe_resp);
      --check if Errors retrieved
      if apex_json.get_members(p_path => '.', p_values => l_json)(1) = 'error'
        then
         l_status := 'Error';
      else
       --check for success
         l_status := apex_json.get_varchar2(p_path => 'status', p_values => l_json);       
      end if;

      return l_status;

end charge_creditcard;